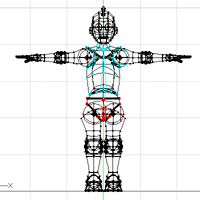
Now, the DojoBot model that I provide already has the bones added to it. You'll need to deal with a clean slate: click here to download a special DojoBot with no skeleton.
Now load that creature
up in a project. Click on the Bones mode in the mode bar at the top
(probably) of your screen.
First we will
create the main column of the spine. Click 'A', and click at the
base of the crotch, dragging upwards to waist level. This creates
a new bone.
This bone will be named something useless like "Bone 1". Change
the name to Pelvis. Now that you have the bone, you need to
assign control points to it. Remember, in assigning control points,
that you want to assign everything that will only move when the Pelvis
moves. In this case, that includes the gymbals that mount the torso
and legs to the pelvis: since they have no surface features, and
are perfect spheres, there is no point in rotating them at all. You
might as well assign them to the Pelvis.
Click 'G' and grab
some points in the pelvis. Make sure that you include the trim.
Click 'G' again, and grab some points on the various gymbals. As you grab
all these points, they should change to the same color as the pelvis bone,
and possibly start to blink (depending on what version of the program you
are using).
Now you've got a smattering of points in the areas that you want assigned.
Fortunately, the areas you want assigned to the Pelvis are all self-connected,
and not connected to anything that you -don't- want assigned. So
you can get away with just tapping the '/' key. This will assign
everything that is connected by splines to the Pelvis. The whole
area should change color (and maybe start to blink).
So, now that you've
done one bone, it's time to move on to the next. Click 'A', and drag
from the end of the Pelvis bone upwards to the top of the sternum.
 This will be your
torso bone. Label it 'Torso'. Select the points of the torso,
and its trim. Click '/' to attach the entire torso.
You will not, in fact, want all of these points to be attached to the
Torso permanently: some of them are more appropriately attached to
the shoulders or the neck. But you can reassign them when you create
those bones.
Now create the
neck. Click 'A' and drag from the end of the Torso bone up to about
the base of the skull. Go to side view, and select the few points
that you want to have connected to the neck. Name this bone 'Neck'.
Finally, you need
to create the head. Click 'A' and drag from the end of the neck up
to the top of the head. Select the points of the head to assign them
to the bone. Name this bone 'Head'.