Right. We'll be adding some motion to
the Neck and Head to achieve Overlap. In order to do this, we will
want to have the Line of Motion a bit further out from the body, so that
the Neck and Head can point at it.
To do this, you will want to enter Model mode. Select the Line
of Motion from the PWS. Click on one of the points in the Line of
Motion, and Select All Connected points. You have now selected all
of the points in the Line of Motion.
 Click 'N' for Translate.
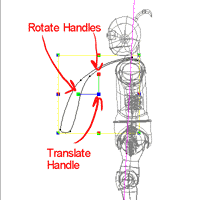
You will see the Pivot outlined in colored lines in the center of the group.
It has handles for translating it and handles for rotating it.
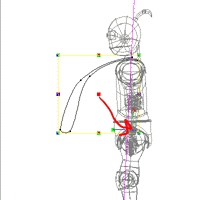
 Click the translate
handle and drag the pivot down to the waist.
 Click 'S' to shift
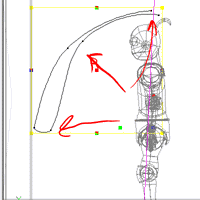
into Scale mode. Click one of the corner boxes of the group-box and
scale the Line of Motion out until it is outside of the head and neck.
If you scrub through the frames, you will see that your motion is substantially
unchanged. This is because the Pelvis and Torso constraints that
you applied were to 'Aim-At' the Line of Motion target. Since the
angle they need to aim has not been changed, the motion is pretty much
the same.
Strictly speaking we should probably have created a whole new Line of
Motion, and left the Torso line of Motion where it was. For more
complicated actions, you will need to do precisely that. It's not
particularly difficult, it's just a lot of drudge-work. Since it's
not needed to demonstrate these principles, I decided we would give it
a miss.
Next Page
Previous Page
Back to Dojo